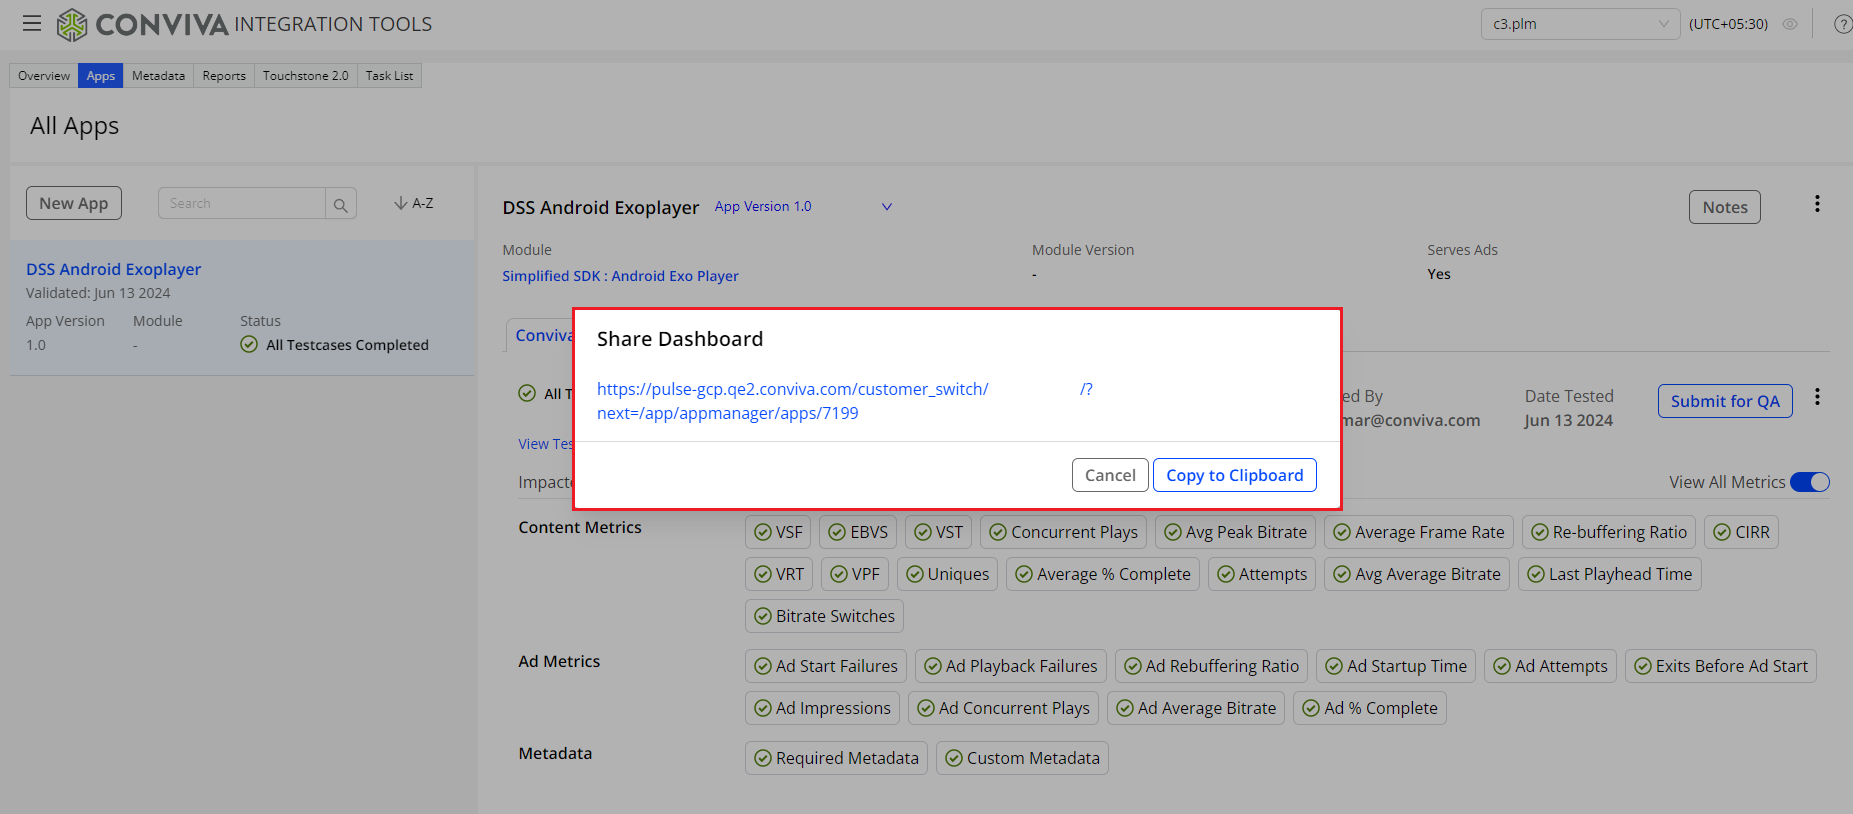
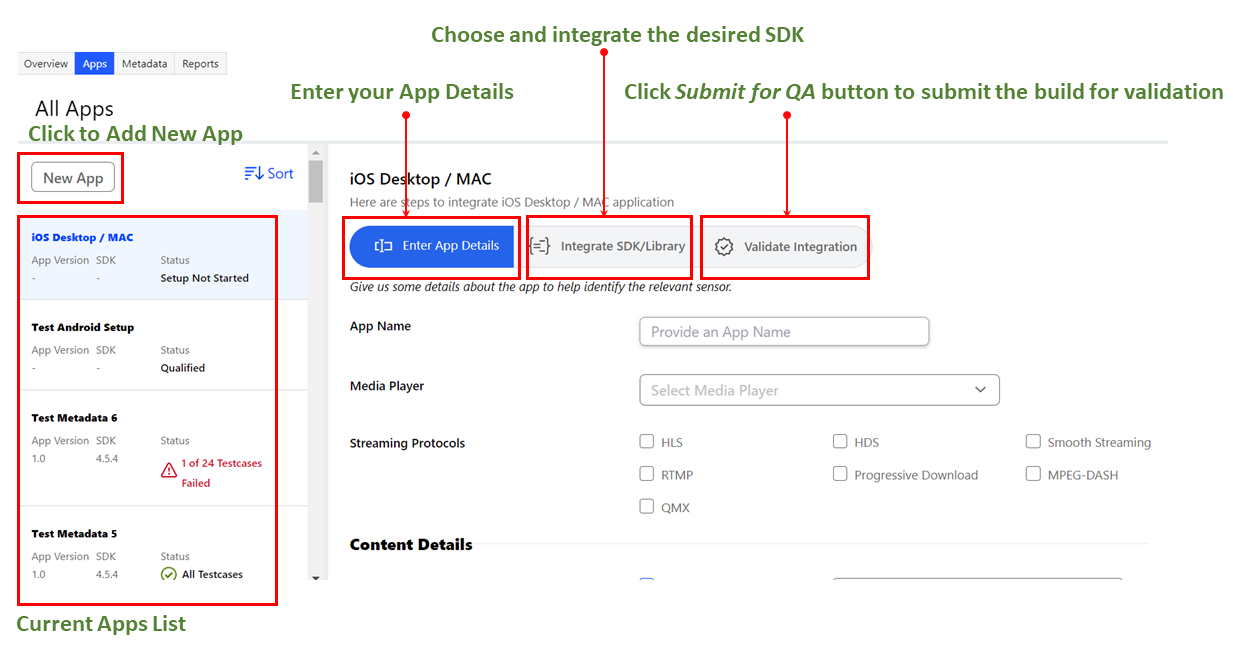
The Apps dashboard displays your device applications and information, such as qualification and validation status, so you can complete all the steps in submission process.
Submitting a build involves:
-
Entering qualification information for a device application
-
Submitting the device application to Conviva for qualification
Inaccurate qualification data and SDK or library identification can lead to inaccurate validation. For example, not specifying pre-rolls when pre-rolls ads are used invalidates the pre-roll test cases. -
Choosing an SDK based on your requirements, and integrating it with your device application
-
Submitting a qualified device application for Conviva validation
-
Checking the validation status and resubmitting when required
Use the Apps dashboard to enter the app qualification data, access integration instructions, and submit your device application builds to Conviva.
Qualifying a Device Application
Use the Enter App Details tab in the Apps dashboard to qualify your device application.
1. Qualify Device Application
-
In the navigation menu, click Apps tab.
The Apps dashboard appears.
-
To qualify a new device application, click New App. To resume qualification, select the device application from the list of device applications.
If you want to delete a device application from the list of device applications, select the device application and in the Enter App Details tab, click Delete App. -
In the Enter App Details tab, provide the device application's qualification information (device application, operating system, media player, content, streaming protocol, and ad information) accurately.
If you are a non StreamSensor customer, you can use the Integrated with Stream Sensor field to select whether your device application is integrated with StreamSensor or not. -
Verify the qualification information and click Next to submit the qualification request. The status changes to Under Qualification and you can now use the Integrate SDK/Library tab to download an SDK as per your requirements.
Integrating Device Application
Use the Integrate SDK/Library tab in the Apps dashboard to download an SDK, and integrate your device application with Conviva sensors.
2. Integrate Device Application
-
Navigate to the Apps tab.
The Apps dashboard appears.
-
Select the device application that requires qualification.
-
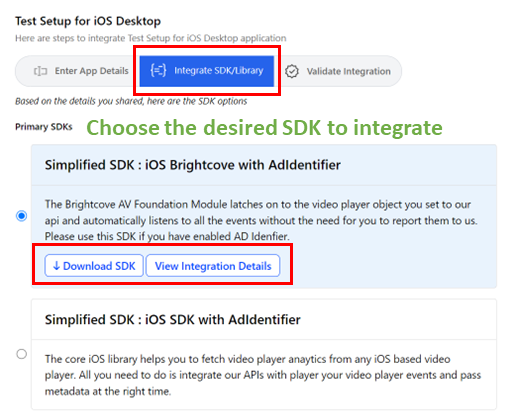
In the Integrate SDK/Library tab, choose a SDK that fits your requirements.
-
To download the SDK, click Download SDK.
-
To view the integration instructions for the SDK, click View Integration Details, which redirects you to the Conviva Docs. To integrate your device application with Conviva sensor, follow the instructions on the Conviva Docs for the desired platform.
To enable faster integration with Android players, click the View Integration Details button for Android apps and install the Integration Assistant Plugin. The plugin automatically adds the SDK dependencies to your Android project and generates a ConvivaHelper.java file with all the code that is required for the integration. -
After you integrate your device application with the Conviva sensor, test your integration by performing self-validation using Touchstone. To see some examples of common validation issues, watch videos available on that page.
-
To initiate the validation process for your device application, click Next.
Submitting Device Application for Validation
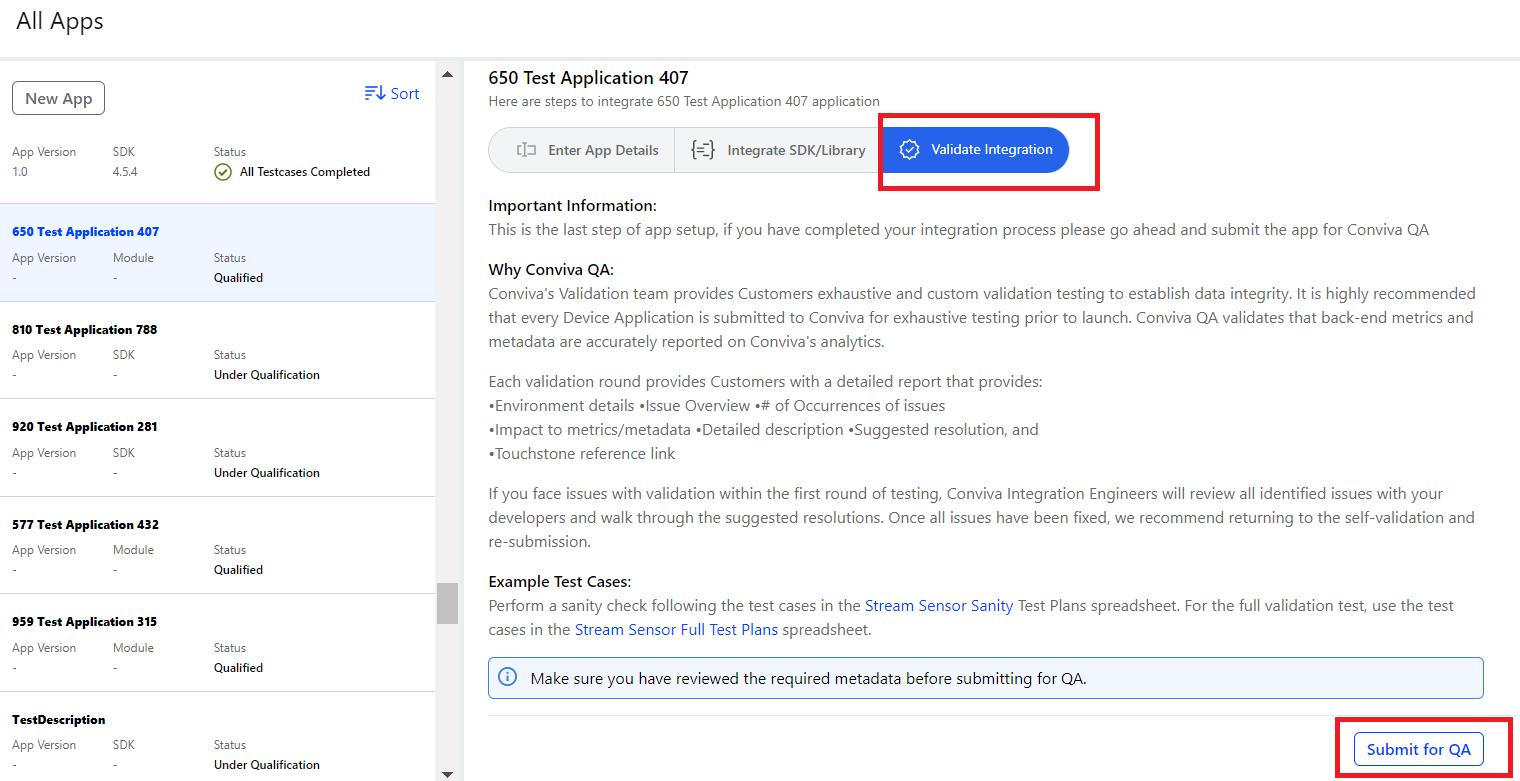
After setting up your device application metadata in Video Sensor Integration, use the Validate Integration tab in the Apps dashboard to submit the qualified device application to Conviva for validation. If your device application passes Conviva validation completely or with minor issues, then your device application is ready for launch. If it fails Conviva validation, then you must fix the issues and re-submit the device application for validation.
Prerequisites
-
Ensure that you've created a device application, added the metadata strategy, and included the desired Conviva SDK integration.
3. Submit Device Application for Validation
-
Navigate to the Apps tab. The Apps dashboard appears.
-
Select the qualified device application that requires validation.
-
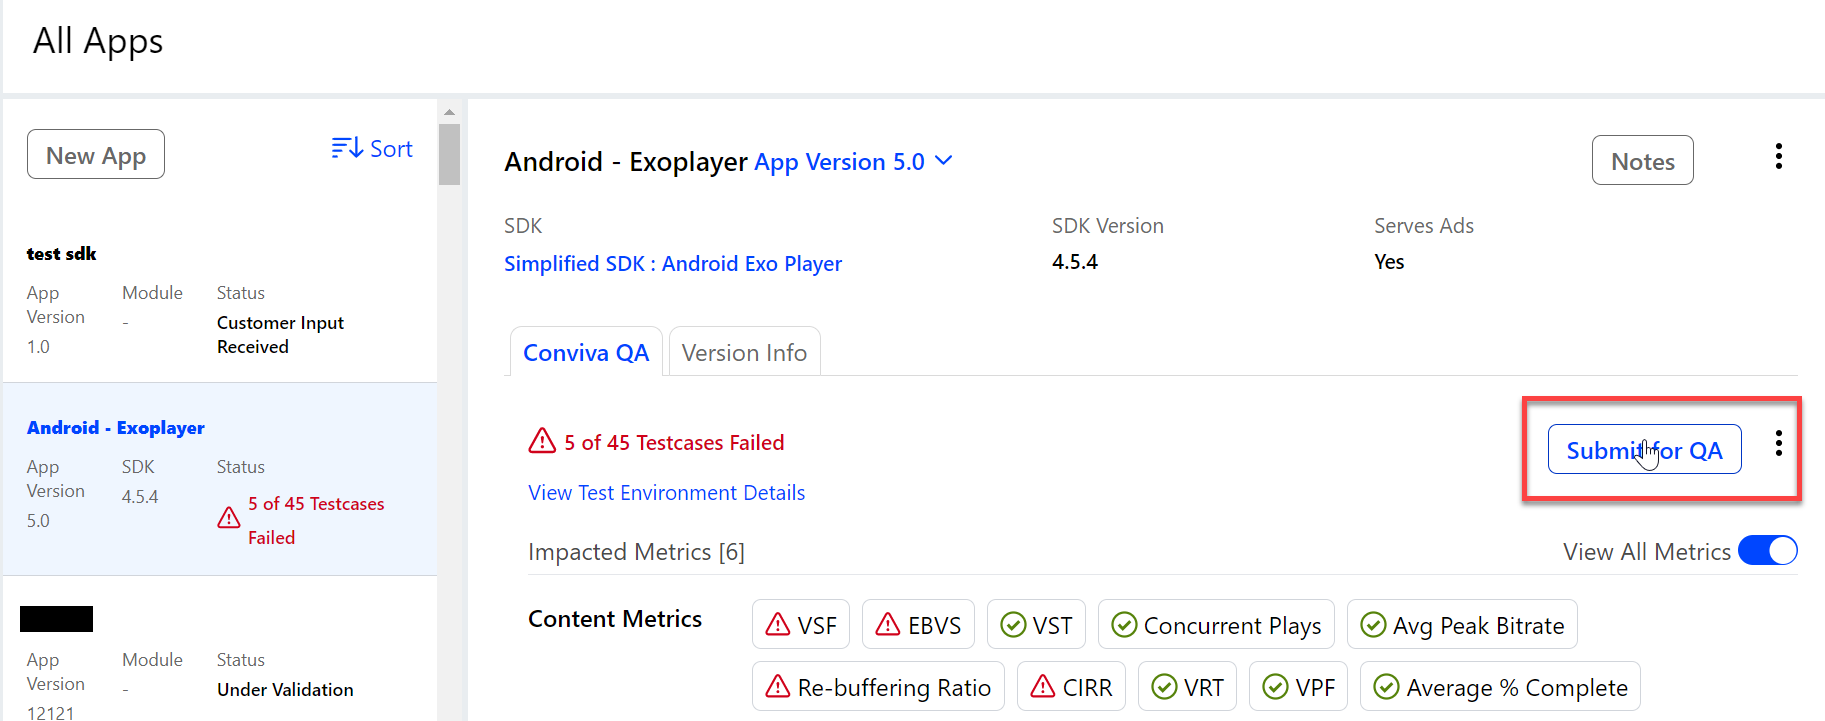
If you're submitting the build for the first time, navigate to the Validate Integration tab and click Submit for QA button.
-
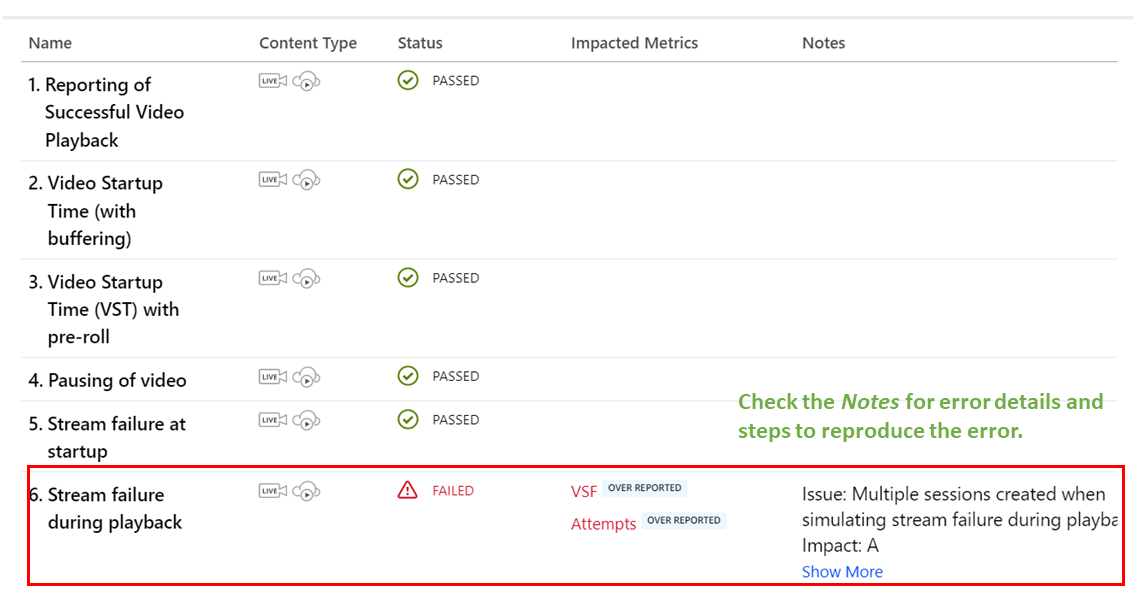
If you've already submitted the build for validation, selecting the app from the apps list displays the previous build validation results on the right-hand section. If the previous validation failed with errors, you must fix them and resubmit for validation.
To find more details about the errors and the steps to reproduce them, check the Notes column for the failed metrics.
Fix the issues and click Submit for QA button to resubmit the build for validation.
-
-
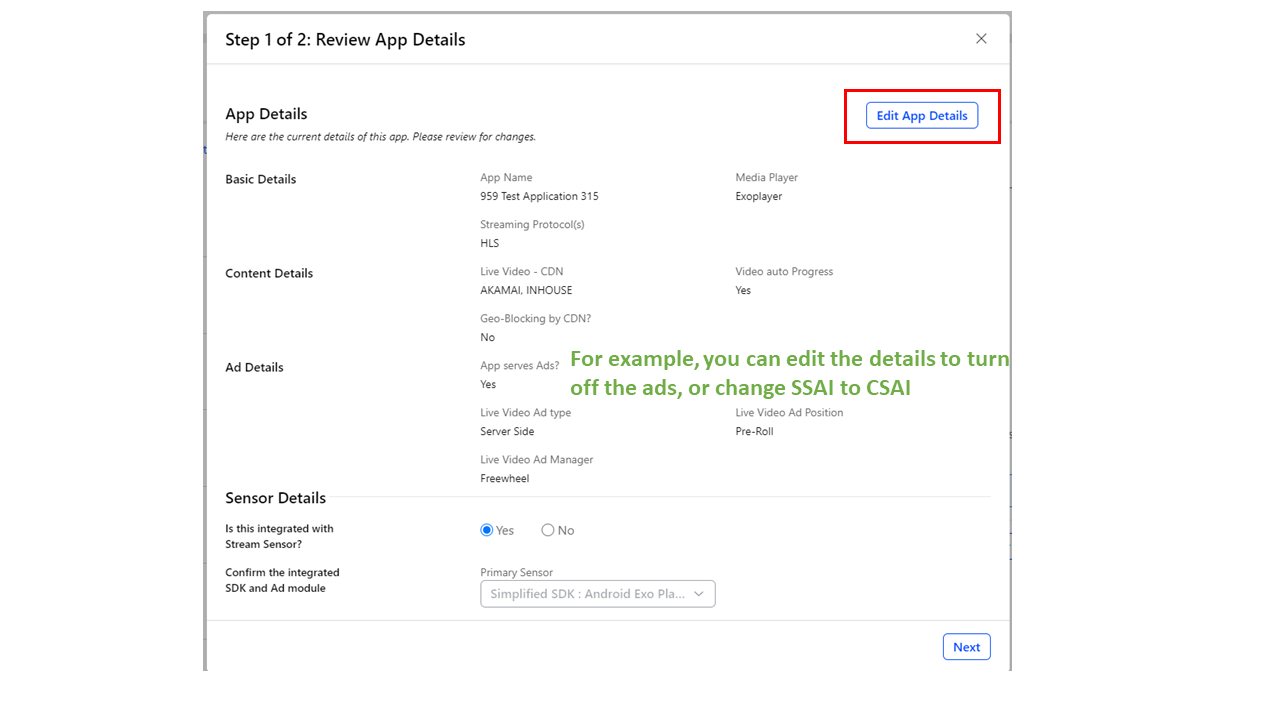
The Review App Details dialog box appears.
-
Verify the device application's qualification information. To edit the information, click Edit App Details.
-
Click Next to continue.
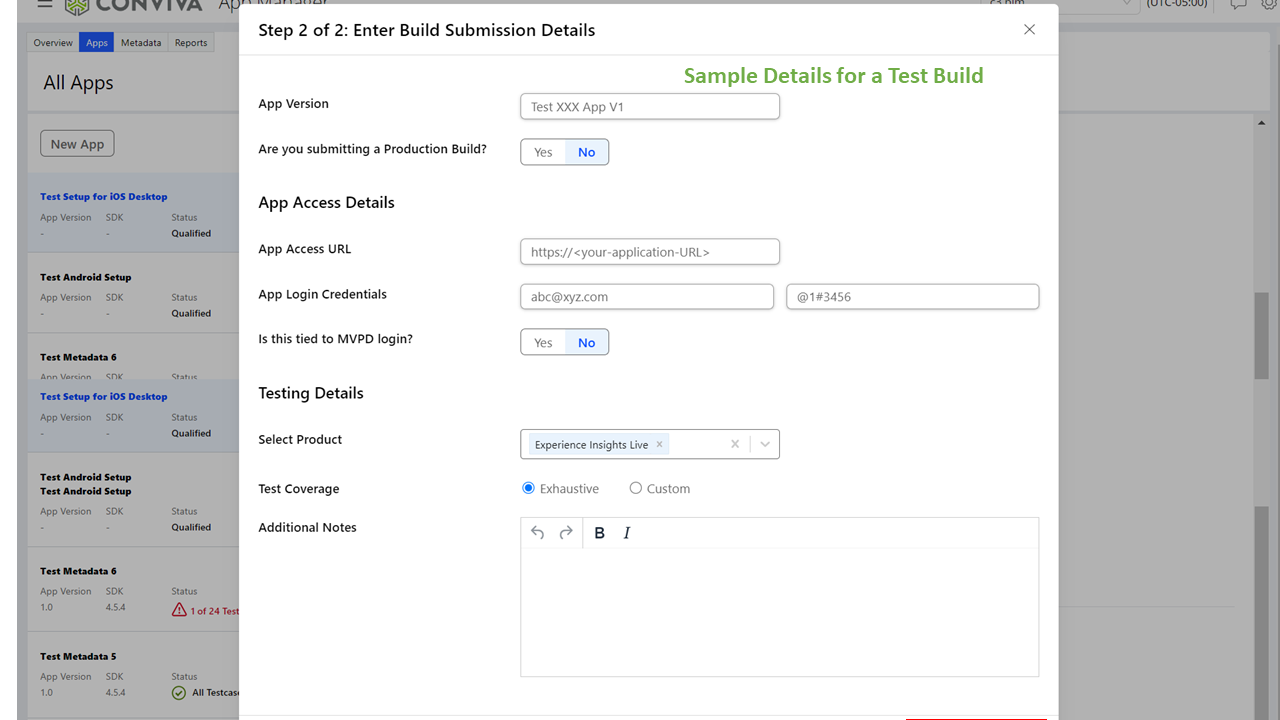
The Enter Build Submission Details dialog box appears.
-
Enter the build submission details and click Submit.
| Form Fields |
|---|

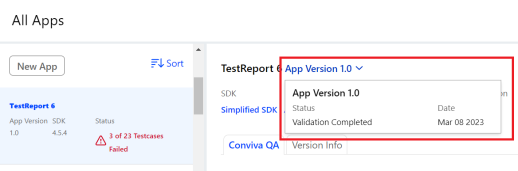
Add the app version number that needs testing An incorrect app version needs a new validation request to be submitted. To know the previous app versions, refer to the version history: |

|
|
Sample URL: https://<your-application-url> The value need not be a URL always. Enter N/A if not applicable. |

|

(If Yes, MVPD Type will be required) MVPD, or Multichannel Video Programming Distributor, is a service that distributes or provides multiple television channels as part of a package to which customers subscribe (e.g. Comcast, DISH, DirecTV) |

Live Video and/or Video on Demand (VoD)
|

Select one of the following options:
|
Any other information the QA may need to access/configure/install the build, such as:
|
Checking Validation Status
After you submit a device application for validation, Conviva validates your device application and the displays the status in the Apps dashboard. You receive an email notification when the build is certified as Validation Passed, Validation Failed, or Validation Passed with Issues.
If your device application passes the validation completely or with minor issues, then you can launch the device application. If it fails the validation, then you must fix the issues and re-submit the device application for validation.
4. Check Validation Status
-
Navigate to the Apps tab.
The Apps dashboard appears.
-
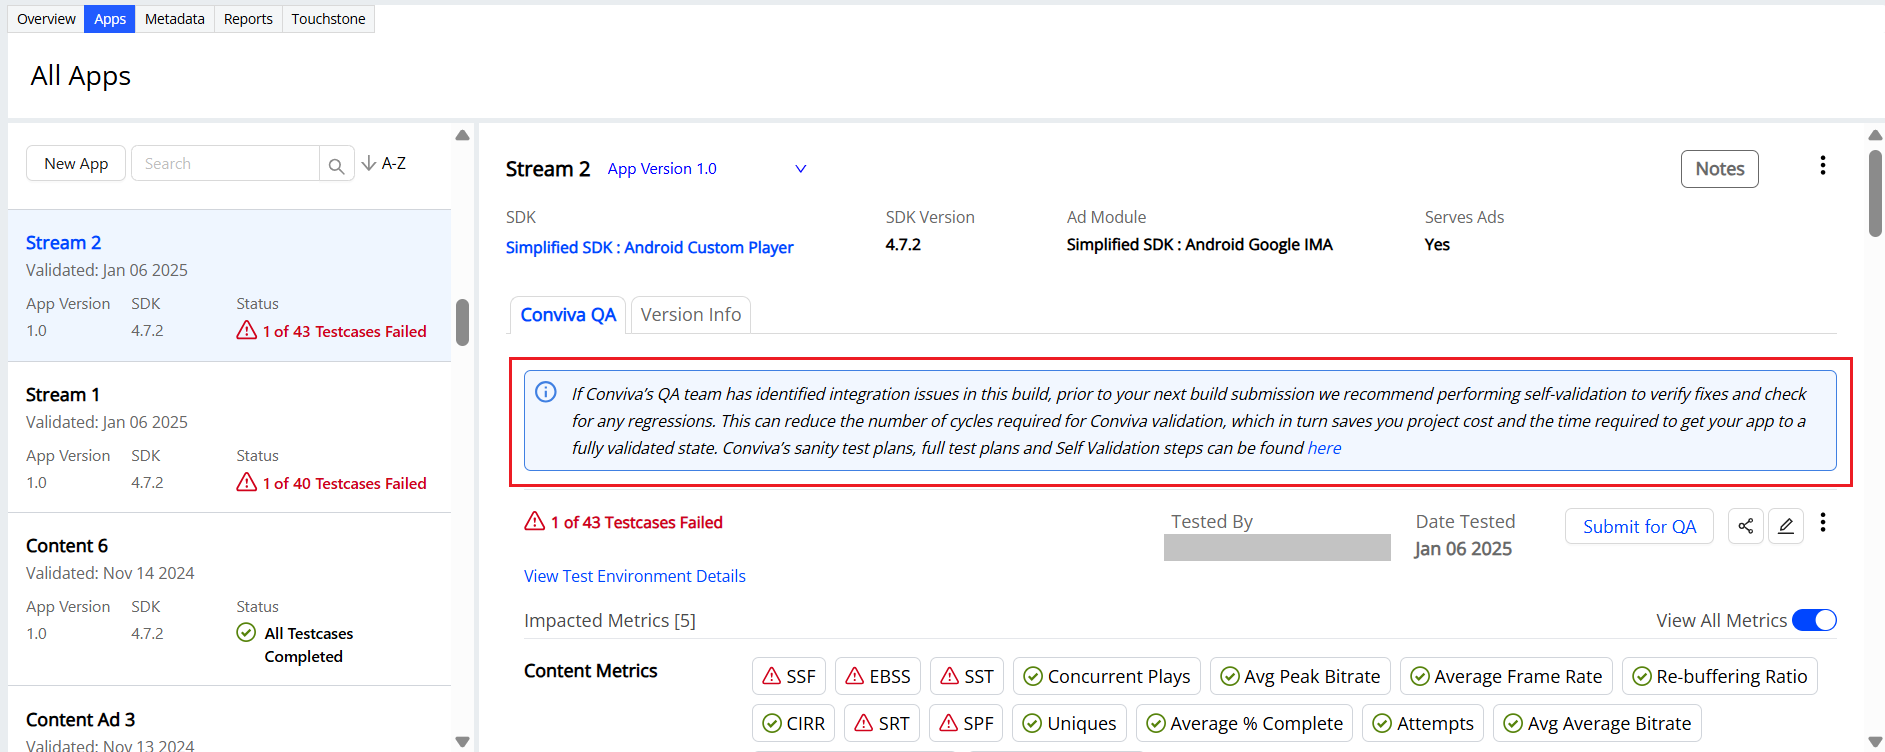
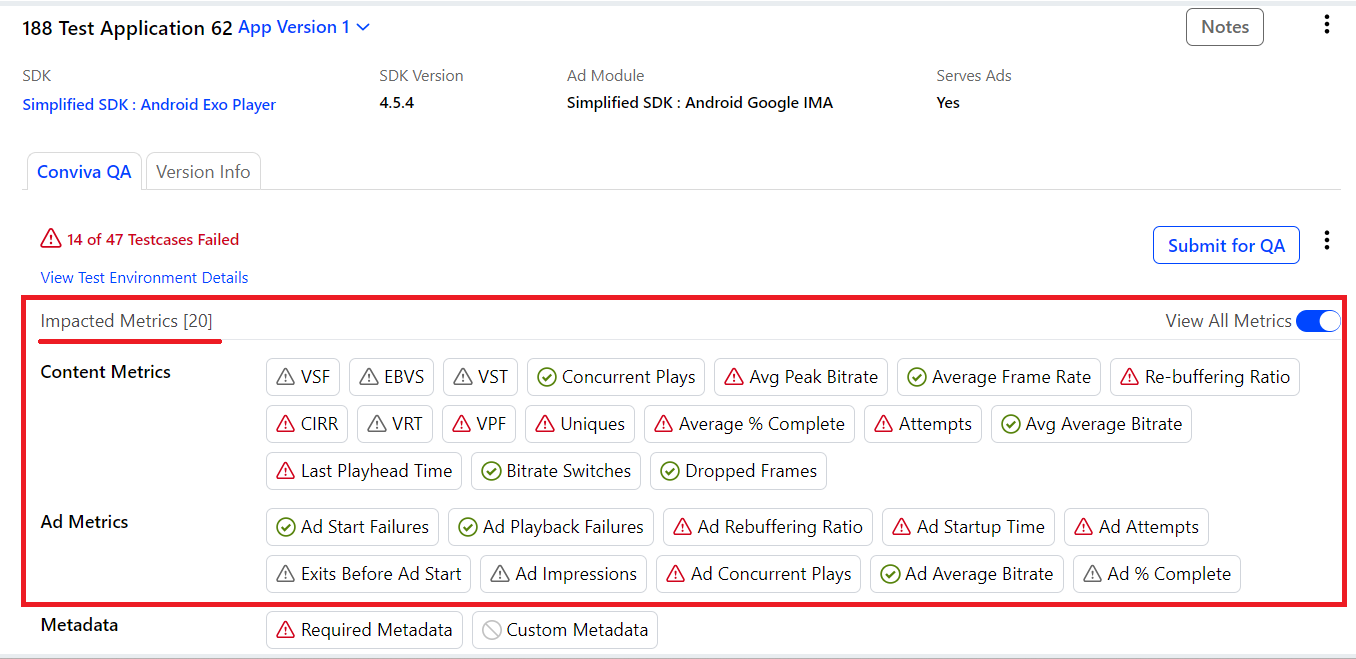
Select the device application. The Conviva QA tab displays the validation results; Impacted Metrics, Required, and Custom metadata.
A note is displayed at the top if at least one testcase is failed.
Column Description Impacted Metrics
This section lists the passed and failed metrics. The metric names are displayed according to the customer type. For example,
-
Video-only customers see the metrics labeled as "VSF" (Video Start Failure), "VST" (Video Start Time), "VPF" (Video Playback Failure), and so on.
-
Stream-only customers see the same metrics labeled as "SSF" (Stream Start Failure), "SST" (Stream Start Time), and "SPF" (Stream Playback Failure).
Red triangle - If a metric is marked as under or over reported, and one or more associated test cases were marked as failed.
Grey triangle - If a metric is marked as under or over reported, and the associated test case was marked as limitation.By default, this section displays all metrics. To view the impacted metrics, toggle the View All Metrics option.
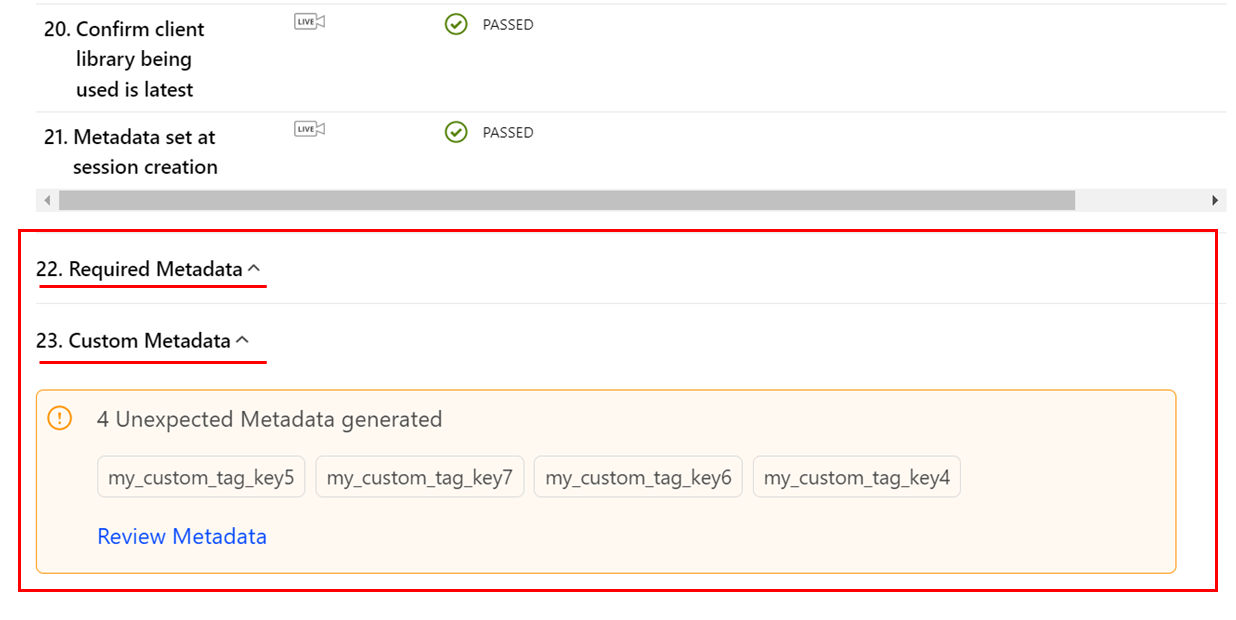
Required Metadata
This section lists the passed and failed Required metadata.
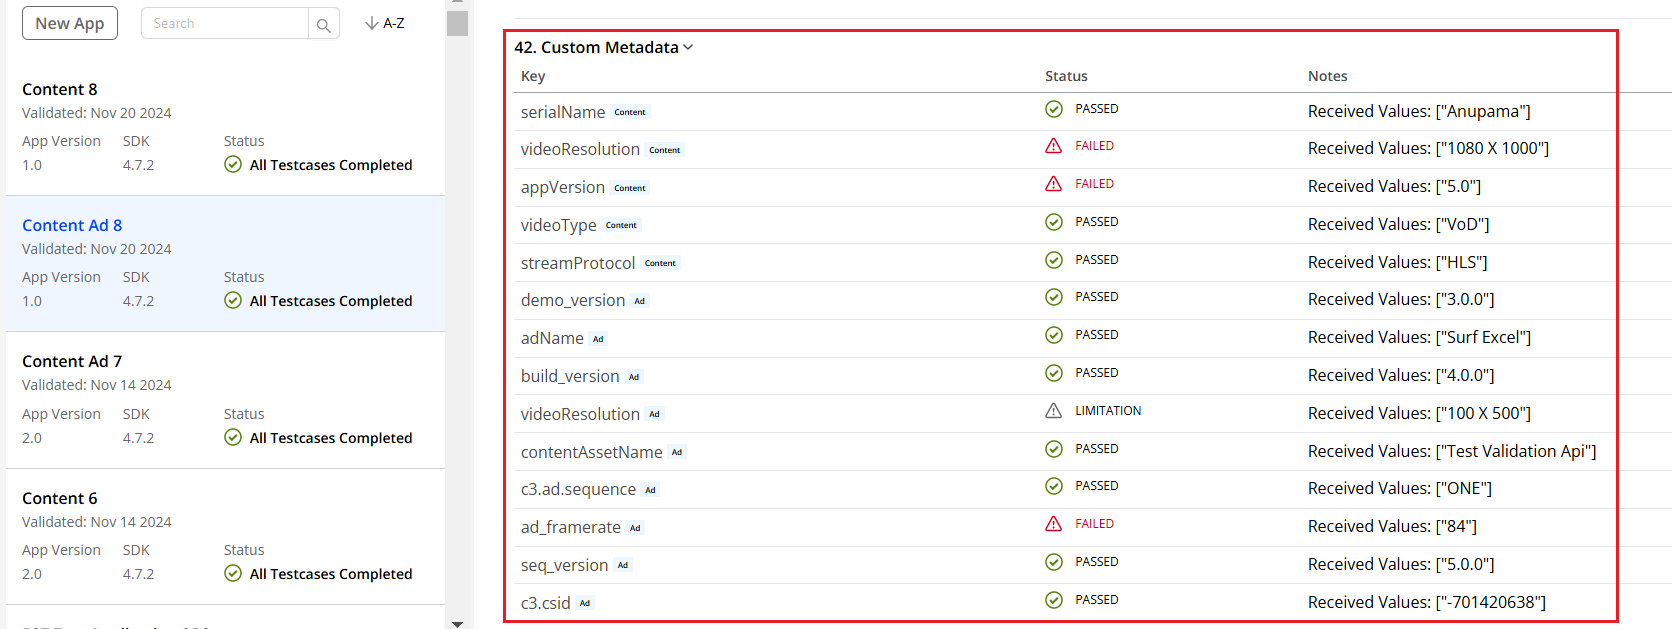
Custom Metadata
This section lists the passed and failed Custom metadata. Identify the custom metadata type by the tag, Content or Ad, adjacent to the metadata key.
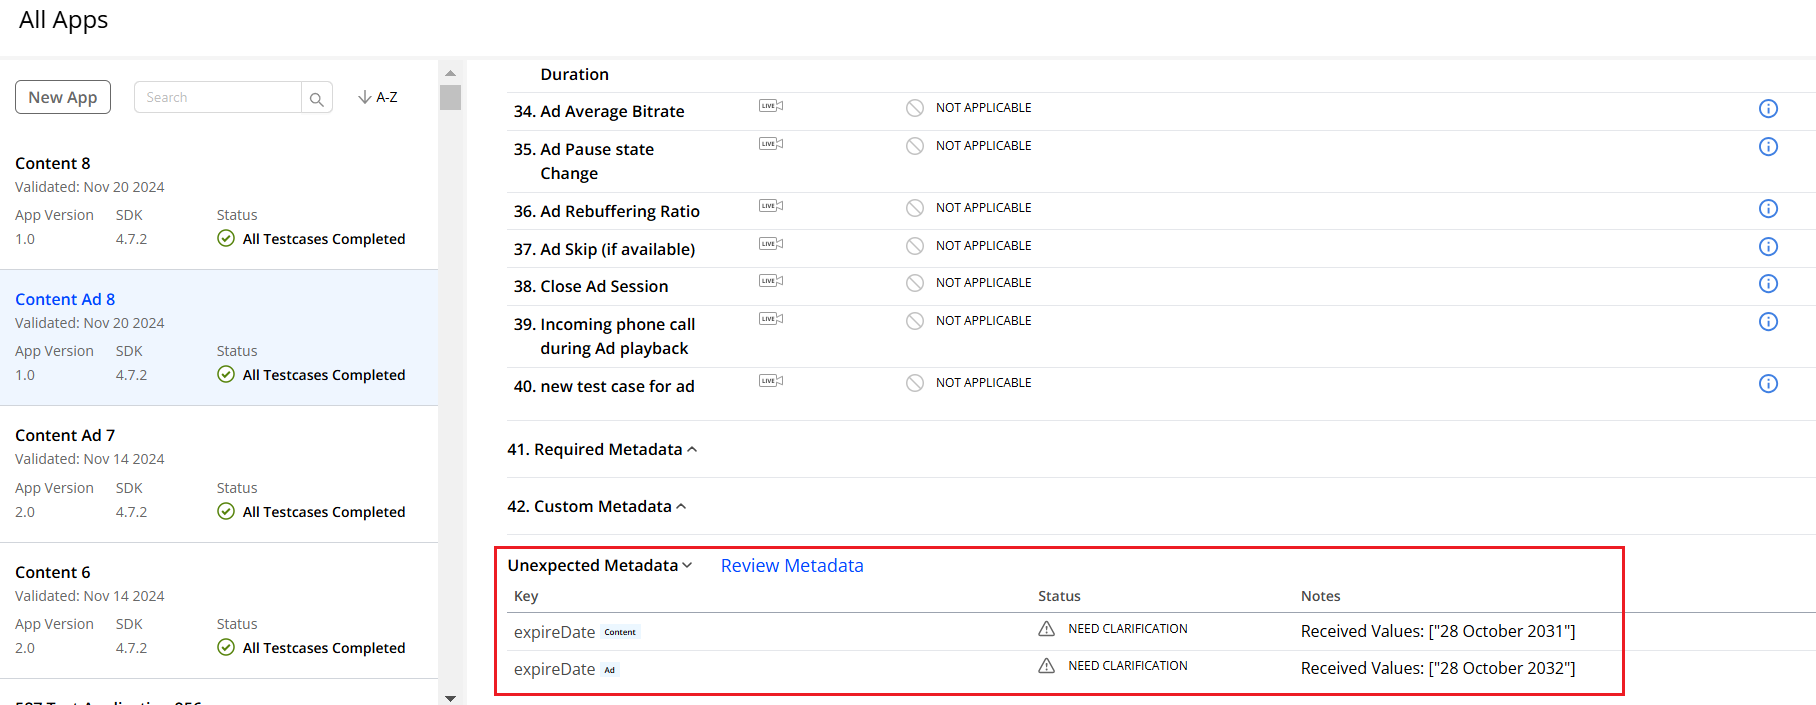
Unexpected Metadata This section lists the passed and failed Unexpected metadata. Identify the unexpected metadata type by the tag, Content or Ad, adjacent to the metadata key.
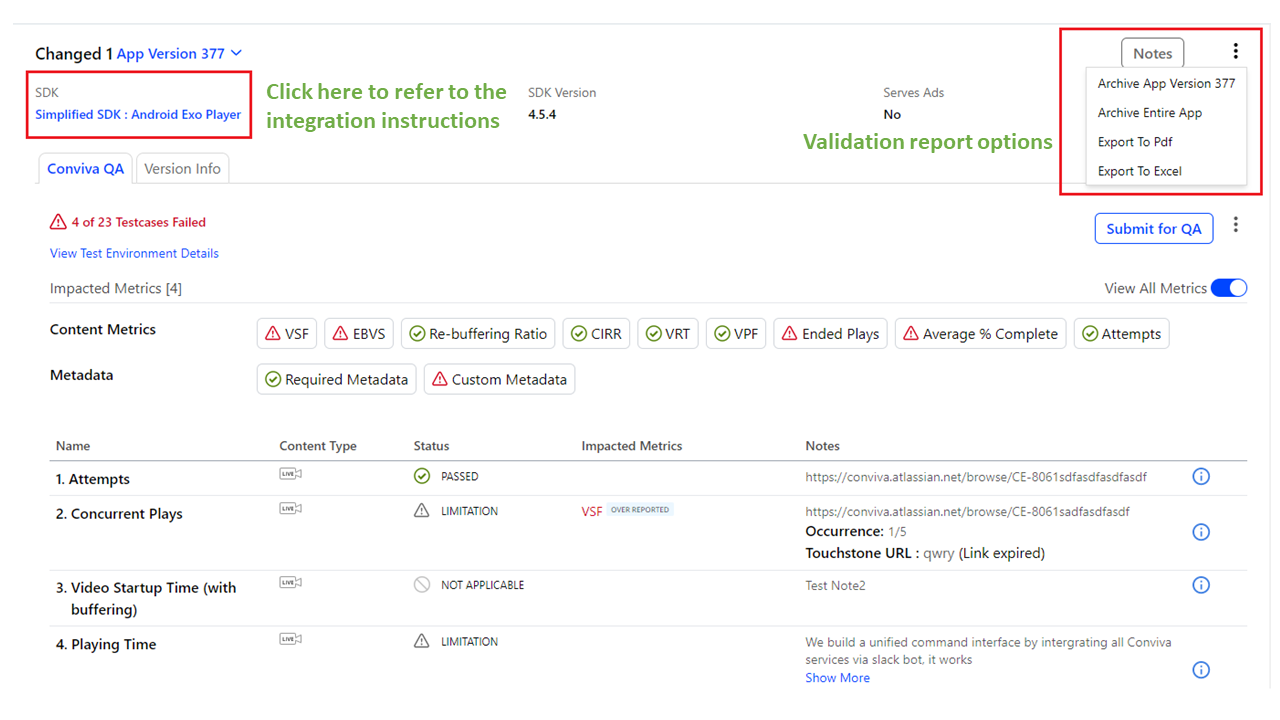
To export the results, click Export to Pdf or Export to Excel from the Kebab icon.
To refer to the integration instructions for your device platform, click theSimplified SDK: <Player Name>link that redirects you to the Conviva Docs. -
-
If your validation fails, fix the issues, and click Submit for QA to re-submit the device application for validation.
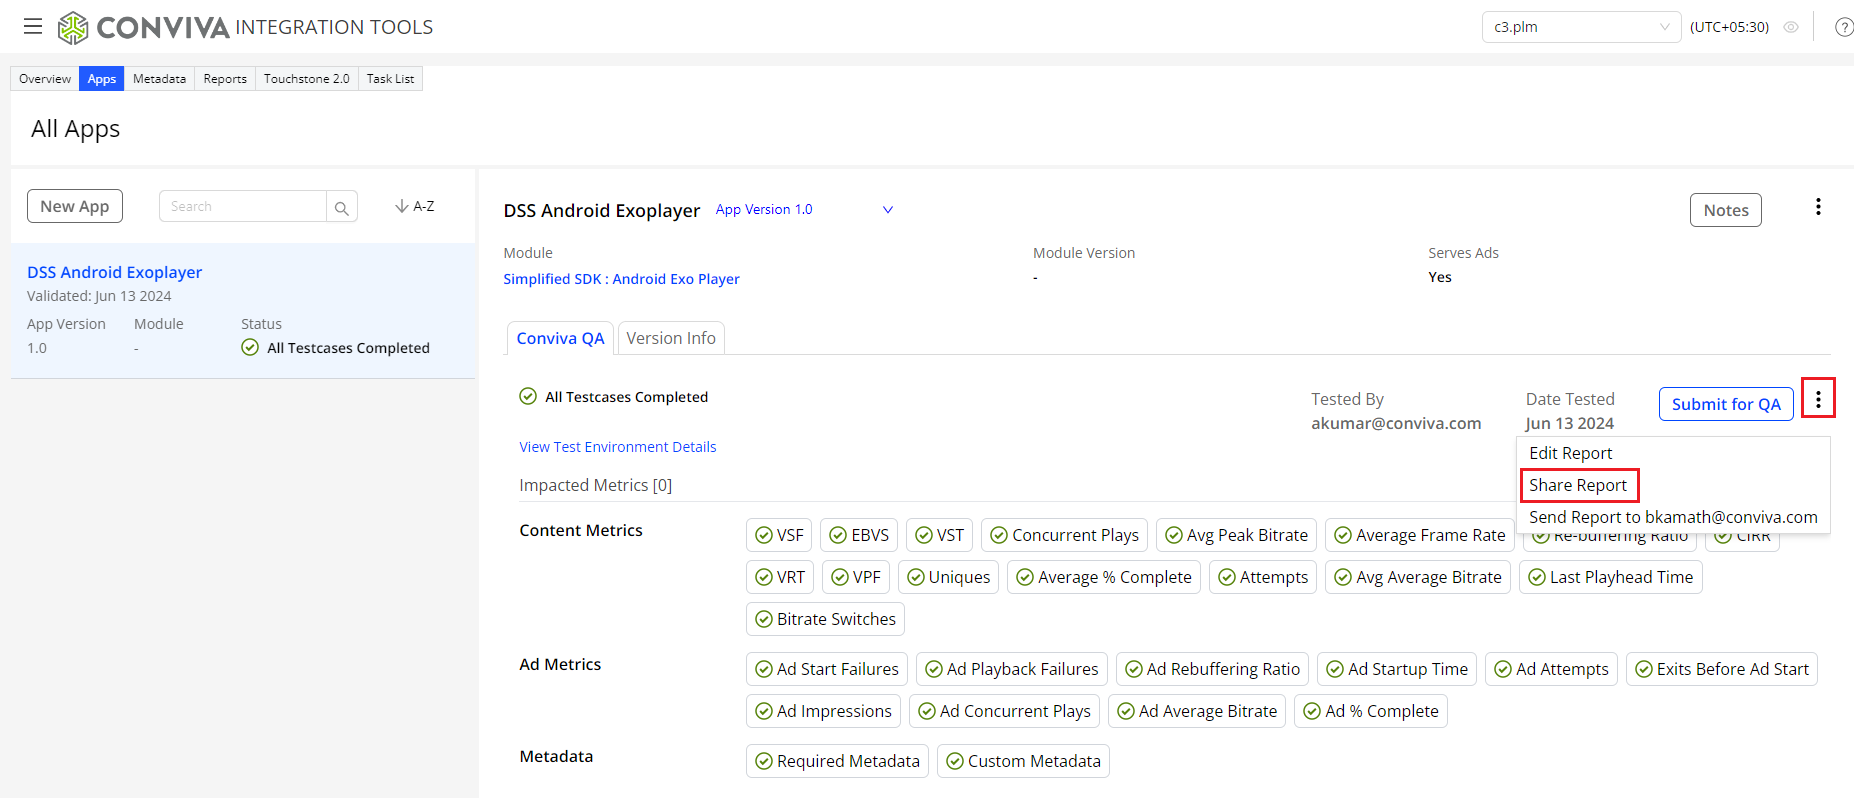
5. Share the dashboard.
-
Click Share Report from the kebab menu adjacent to the Submit for QA button.
-
Click Copy to Clipboard in the Share Dashboard pop-up window, and share the copied link with others.