
For the Conviva customers, who are using the AWS (Amazon Web Services) or GCP (Google Cloud Platform) accounts, configure the roles, permissions, and Amazon S3 storage buckets to ensure seamless data exchange.
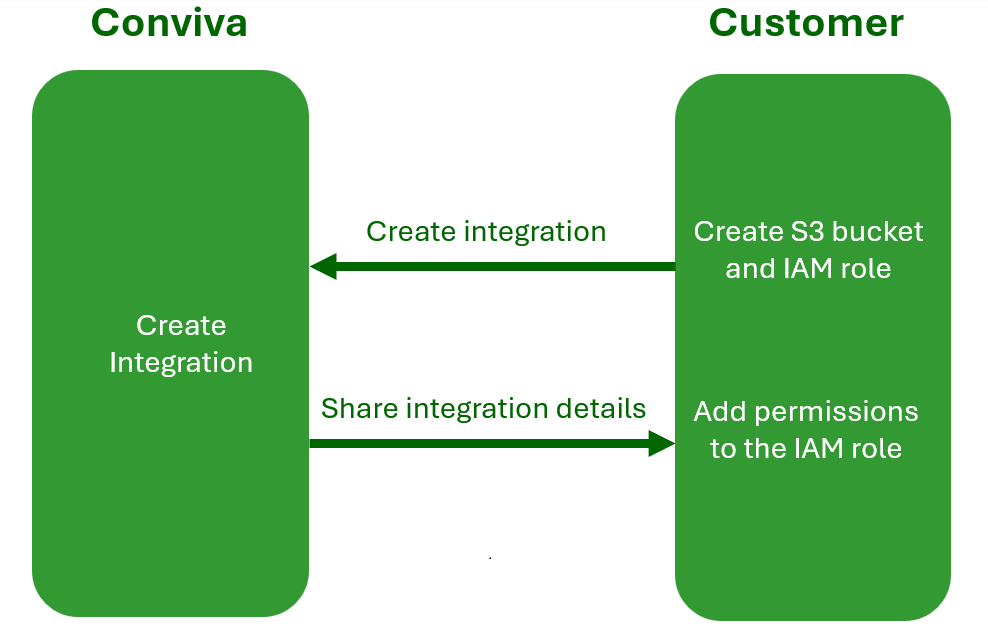
Customers using the AWS account can choose between using a common or individual AWS account. The common AWS account is shared by all customers. Both cases require the creation of an Amazon S3 bucket, establishment of IAM role, and attachment of appropriate policies.
For GCP account, customers need to follow the steps outlined for individual AWS accounts, set up the Google Cloud Storage (GCS) bucket, configure integration details, and assign necessary permissions to the service account.
Use either of the following options:
Common Conviva AWS Account for all Customers
Go to the AWS console.
(Optional) Set up a new Amazon S3 bucket in your AWS account.
Create an IAM role in your AWS account specifically for the Conviva AWS account.
Add an appropriate inline policy to the IAM role to grant the necessary permissions. Ensure the policy allows Conviva to perform the required actions on the S3 bucket.
Send the S3 bucket details, including the bucket name and relevant configuration information to Conviva customer support team through Pulse Portal Support page or email to Conviva Support.
Separate Conviva AWS Account for each Customer
Go to the AWS console.
(Optional) Set up a new Amazon S3 bucket in your AWS account.
Create an IAM role in your AWS account specifically for the Conviva AWS account.
Use Conviva’s self-serve UI or email to Conviva Support to create Connect Integration with the following details:
ALLOWED_LOCATIONS: List of allowed S3 bucket paths.
BLOCKED_LOCATIONS: List of denied S3 bucket paths.
AWS_ROLE_ARN: Created in the step #3.
- Get the following integration details from Conviva’s self-serve UI or from the Customer Support team:
AWS_IAM_USER_ARN
AWS_EXTERNAL_ID
- Add an appropriate inline policy to the IAM role to grant the necessary permissions. Ensure the policy allows Conviva to perform the required actions on the S3 bucket.
GCP Service Account for the Customers
Go to the AWS console.
(Optional) Set up a new Amazon S3 bucket in your AWS account.
Use Conviva’s self-serve UI or email to Conviva Support to create Connect Integration with the following details:
ALLOWED_LOCATIONS: List of allowed S3 bucket paths.
BLOCKED_LOCATIONS: List of denied S3 bucket paths.
- Get the following integration details from Conviva’s self-serve UI or from the Customer Support team:
- GCP_SERVICE_ACCOUNT
Grant the Service Account Permissions to access the S3 bucket objects.
Assign the Custom Role to the Cloud Storage Service Account.
Conviva Integration Objects
List of integration objects:
| AWS | GCP |
|---|---|
|
|